What the Picture / Video card does
The Picture / Video card brings one image or a supported video link into an edauthor Activity Card sequence. Add a title, a Question / Prompt and an optional caption, then show the card in your session. Participants see the visual on their own devices as well as on your presentation screen. Use it to introduce a case, examine evidence, demonstrate a process or create a shared starting point for discussion.
You do not need a complicated image. A clearly labelled chart, a photograph of a process, a diagram or a short clip can be enough. Choose the visual because of the thinking you want it to prompt.
Build your first image card
Prepare the visual and your question before the session, then work through these steps.
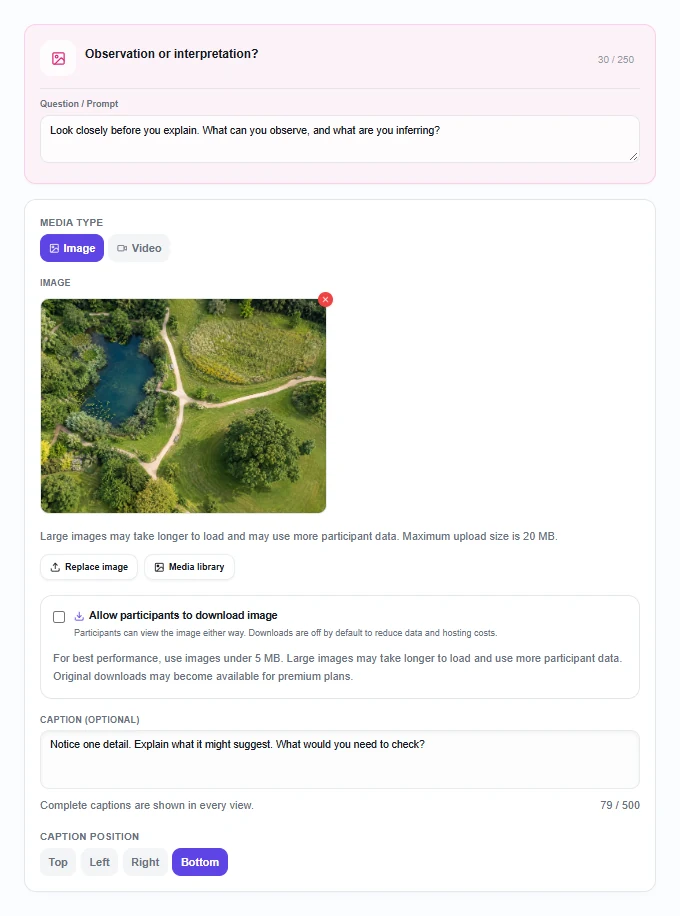
- Open your Activity Cards in the editor. In the card list, select Add Activity, then Picture / Video. Give the card an optional title that helps you recognise it in the sequence, such as “Observation or interpretation?”.
- Set the Question / Prompt. Tell participants what to do with the visual. “Look for one detail that supports your interpretation” gives them a clearer task than “Discuss this image”. Keep the instruction short enough to take in at a glance.
- Choose Image under Media type. Use Upload new, drop an image into the empty image area, or select an existing image from Media library. Once an image is selected, Replace image lets you change it.
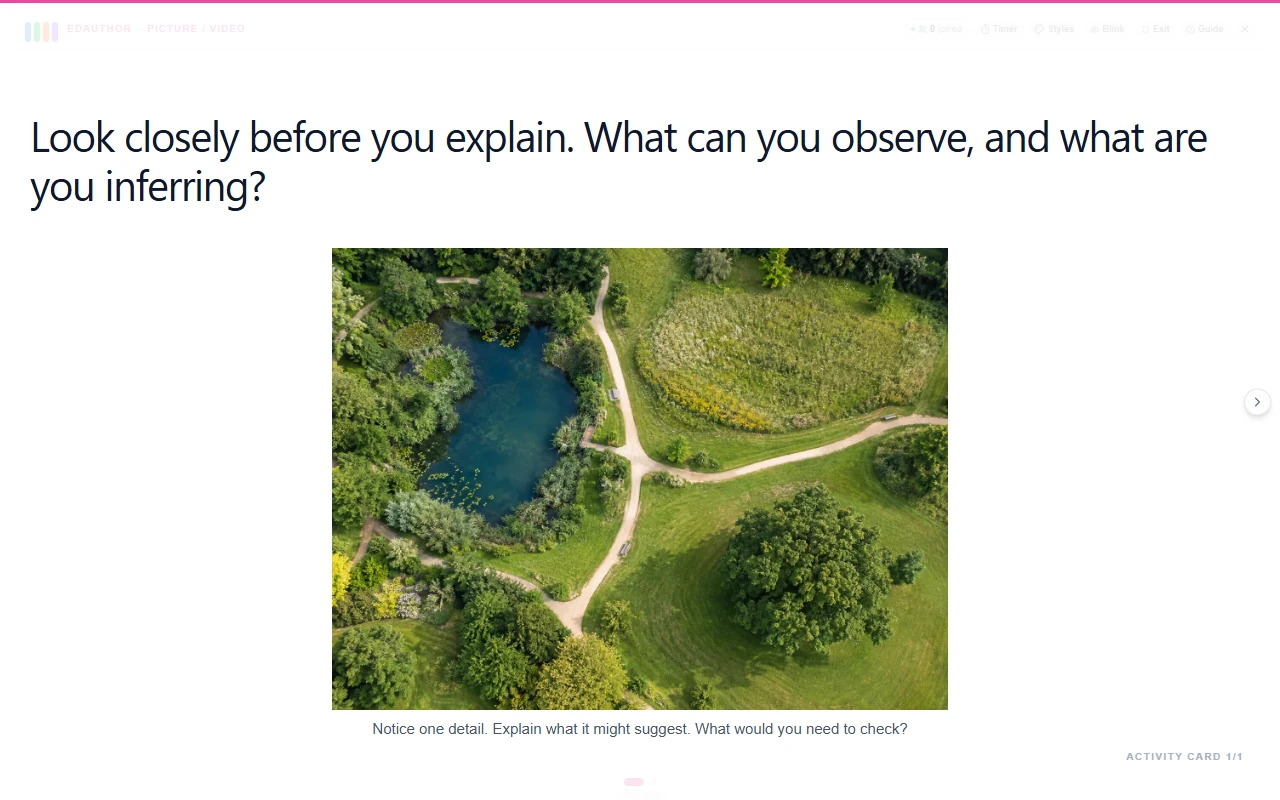
- Add a Caption (optional). Use this for context, a source credit or a focused question. New captions can contain up to 500 characters. A useful caption might be: “Notice one detail. Explain what it might suggest. What would you need to check?”
- Choose Caption position. Select Top, Left, Right or Bottom. Side captions work alongside the visual when the host view has enough space; narrower views stack the content. Check the layout that you will actually present.
- Decide whether participants need a copy. Allow participants to download image is off by default. Enable it if a downloadable image would help the activity. The available download mode is Optimised image only; the original-image option is not currently enabled.
- Save and check the sequence. Use Save in the editor. Place the follow-up activity after the image card, then preview the visual and its wording before you teach.
Keep important labels legible on a phone. If an image contains a whole page of small text, crop it to the detail students need or split the material across several cards. Check the upload-size guidance shown in the picker and keep files compact so they load comfortably during the session.
Use a video with a viewing question
Under Media type, choose Video, then paste a supported HTTPS address into Video link. The card accepts YouTube, Vimeo and direct video-file links, including MP4 and WebM. The video must also be available to viewers and playable in their browsers; a supported URL format alone does not guarantee that the provider will allow playback.
The editor shows a player preview when it recognises the link. Add your question and caption, then save. This card uses a video link rather than a video-file upload control.
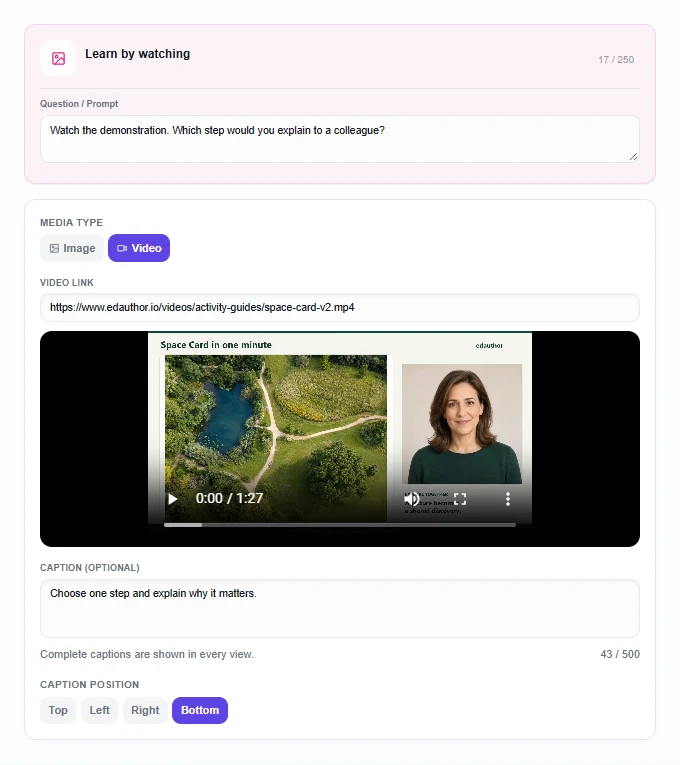
Before playing a clip, give participants one thing to look for: “Which decision changes what happens next?” or “What evidence supports the speaker’s conclusion?” Allow a short pause afterwards before asking for responses.
Playback is controlled locally in each player. Starting a video on your screen does not synchronise everyone’s device. For shared viewing, play it on the room screen or through your usual online-teaching setup and give a clear start and stop instruction. For individual viewing, tell participants when to finish and which activity comes next.
Use a brief, relevant extract where possible. Check sound, captions supplied by the video provider and playback on the devices you expect people to use. Offer a short written description or summary for anyone who cannot access the clip.
What participants see
When this card is active, participants see the image or video and its accompanying text in their session view. They can enlarge an image to inspect details. If you enabled image downloads, they can also download the optimised image.
On participant devices the layout stacks vertically: Top and Left captions appear before the visual; Bottom and Right captions appear after it. This keeps the complete caption readable without requiring a wide screen.
Tell the class whether you want silent thinking, conversation or a later written answer. There is no answer box on this card. When you move to a response card, explain whether everyone submits individually or whether you are using a group-response mode supported by that other card.
Try a 12-minute observation activity
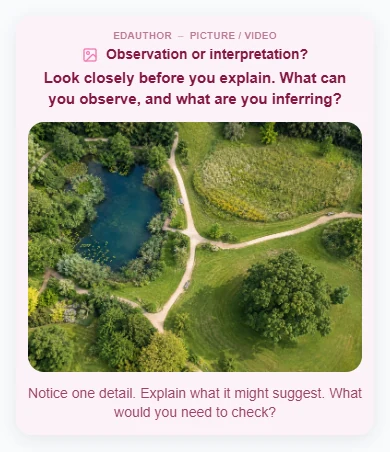
This suggested seminar activity helps students practise distinguishing observation from interpretation. Use a photograph, chart or illustration relevant to your subject. The illustrated park in this guide is a practice scene, not evidence about a real location.
Prepare a Picture / Video card followed by two separate Thought Bubble cards. On the visual card, use:
Look closely before you explain. What can you observe, and what are you inferring?
| Stage | Time | What you do | Card or tool |
|---|---|---|---|
| Look | 2 minutes | Show the visual. Give everyone quiet time to notice details. | Picture / Video |
| Record an observation | 2 minutes | Ask each participant for one detail they can point to in the visual. | Thought Bubble: first card |
| Compare interpretations | 4 minutes | Revisit the visual. In pairs, discuss what a detail might mean and what evidence is missing. | Picture / Video and conversation |
| Reconsider | 2 minutes | Ask for a revised interpretation or one question that needs further evidence. | Thought Bubble: second card |
| Draw together | 2 minutes | Read contrasting contributions and ask what supports each explanation. | Thought Bubble results |
The first response prompt is:
What is one detail you can point to in this visual? Describe it before explaining it.
For the second response, ask:
What might that detail suggest, and what would you need to check before accepting that interpretation?
Everyone submits their own answer on the Thought Bubble cards. Keep the two activities separate so the initial contributions remain available. You can revisit them during the discussion; this is a facilitator-led comparison, not automatic measurement of individual change.
If you want to extend the task into organised group work, use the group learning guide. A visual can provide shared material while groups develop different explanations or consider different stakeholder perspectives.
Adapt the card to your teaching
Open a case without giving away the answer
Show a photograph, document extract or diagram before explaining the case. Ask what students notice, then what they would investigate next. Follow with Thought Bubble to collect questions, or Multiple Choice to choose between plausible next steps. Keep identifying details out of teaching material unless you have an appropriate basis to share them.
Pause a demonstration at a decision
Use a short video to introduce a process or worked example. Ask participants to predict the next step before continuing. A following Multiple Choice card can make the range of predictions visible; invite explanations before revealing your reasoning. The response belongs to that follow-up card, not to the video player.
Examine a chart or an argument
Present a graph, a model or an excerpt from a public message. Ask “What does this show?” and “What does it leave out?”. For a graph, direct attention to the axes, scale, source and comparison being made. Use a second visual card to introduce additional context, then ask whether it changes the interpretation.
Give a workshop a shared reference
Show a design, workflow or proposed layout while a team discusses a practical decision. A caption can keep the central question visible. Follow with Rank Items to prioritise possible changes or Thought Bubble to record a reason.
Questions lecturers often ask
Can I put an image and a video on the same card?
The Media type setting selects which one the card displays. Use two Picture / Video cards in sequence if you want to show an image and then a video.
Do participants answer on the Picture / Video card?
No. It presents content. Collect contributions on a separate response card, or use the visual as a prompt for spoken discussion. See the Activity Card manual for other card types.
Can I use a YouTube or Vimeo link?
Yes, with a supported HTTPS link. Check the player preview and test access before teaching, because provider restrictions or unavailable videos can prevent playback. The card also accepts supported direct video-file links.
Can participants keep the image?
They can download the optimised image when you enable Allow participants to download image. Otherwise they can still view and enlarge it. Enabling a download control is a sharing choice, so use material you are entitled to distribute.
What makes a useful caption?
Give just enough context to orient the reader, then a specific task: “Identify one assumption” is easier to act on than “Any thoughts?”. Keep within 500 characters, describe essential visual information aloud or in text, and leave time for participants to think before asking them to speak.
Give the visual a next step
Choose something worth looking at. Ask a question that rewards attention. Then make room for people to explain what they noticed and why it matters.
Explore the Activity Card manual or return to the group learning guide to connect your visual prompt with a wider session.